Why I do what I do

There are times in my life, I have to pinch myself to believe this is really my job. I didn’t plan to create my own handcrafted clothing line, it happened & I embraced it.

I absolutely LOVE what I do, love to create & love when you all get your packages and are as excited as I am! I am one woman, a wife, a mother, sister, daughter. I feel very blessed to be able to share my talent with women all over the world. I love being in a place where I can be a part of another woman’s happiness & see her confidence as she gets to spoil herself a bit with something new ❤

IMG_2647

“Disaster Dress” refashion

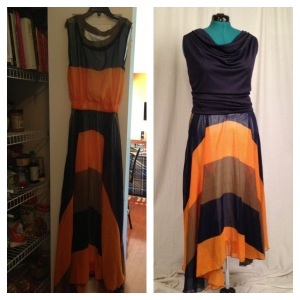
Before & After pics of this refashion:

20130814-234601.jpg

My friend, Nicole ordered this cute dress and when it arrived, the sizing was WAY off! It was so small that it may fit a size 0-2. She sent it to me to see if I could do anything with it. I was afraid I would only be able to save the bottom portion of the skirt because it was that small!

Well, I removed the elastic in the waist and chopped off the top of the dress since the bust line would not fit her.

I ended up saving the entire skirt portion of the dress because I changed the top to a yoga waistband. I made this “disaster dress” (as my friend called it) into a cute maxi skirt w/a custom drapey tank to match. I can’t wait to see pics, Nicole!

What would you like to learn?

What tutorials would you be interested in?

*Taking in or letting out trouser pants?

20130715-215155.jpg

*Making your own patterns?

20130715-215309.jpg

*Altering/customizing store bought patterns?

20130715-215609.jpg

Let me know which one you are most interested in & I’d love to write a tutorial 😉

RefashionMama on FB

T-shirt refashions

Just wanted to share a couple recent refashions I’ve created out of t-shirts.

I started with a stack of t-shirts

20130531-235932.jpg

And made this…custom-made to her body measurements.

20130601-000051.jpg

I took another stack of tshirts and created this cute dress with them! Love how it turned out too!

20130601-000152.jpg

NEW Design: Custom-fit Gaucho Pants

Introducing the NEW custom-made-to-your-measurements Gaucho Pants!

I’m so excited to share this design with you as I have only designed tops, skirts & dresses thus far. I love being able to now offer pants…both available in full length or capri & in any fabric of your choice.

These are ONLY $25 now through Friday night during the Early Bird Special!

20130411-150857.jpg

To order, please go to RefashionMama Boutique

$1 fabric headband SALE!

$1 Fabric Headband SALE will be this Wednesday 4/10 starting at 11 a.m. pst HERE

On facebook, SHARE THIS PHOTO to be entered to WIN a FREE specialty headband (additional entry for each friend you refer). Please make sure you select PUBLIC when sharing so your entry counts.

When the sale starts, I will post a photo of each available headband with the quantity available. You MUST comment with your Paypal/email.

U.S. Shipping is as follows: 1-3 headbands $2 shipping; 4-6 headbands $2.75 shipping, 7-10 headbands $3.50 shipping; 11+headbands $5.35 priority flat rate shipping. ALL shipping options come with tracking numbers. If outside of the U.S., please contact me ahead of time and I will give you shipping details.

20130408-151910.jpg

Jenni maxi dress w/pockets

I’ve been making a lot of maxi skirts & maxi convertible dresses, so I decided it was time to make a cute style dress with pockets.

Introducing the NEW Jenni maxi dress w/pockets!

20130408-084506.jpg

The Jenni maxi is available now custom-made to each clients individual body measurements and in the fabric of your choice. Choose between short n sassy (as shown) or floor length.

20130408-084743.jpg

20130408-084753.jpg

20130408-084801.jpg

Please visit my RefashionMama Boutique

Introducing several NEW custom designs

Introducing several NEW designs in my boutique, all made to each clients body measurements and fabric of their choice.

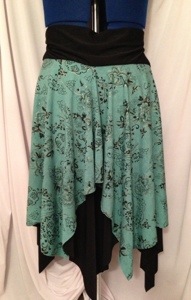
Jagged Hem Skirt

20130404-120607.jpg

Flutter Top

20130404-120734.jpg

Skinny Mini pencil skirt

20130404-211741.jpg

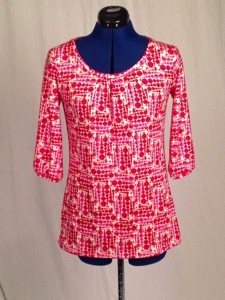
Penny tunic

20130404-211905.jpg

Spring Fling skirt

20130404-212444.jpg

Lacey tee

20130404-212527.jpg

Sasha dress

20130404-212606.jpg

Maxi skirt

20130404-212642.jpg

Tee

20130404-212810.jpg

Keli top

20130404-212914.jpg

Lacey sleeveless cardi

20130404-212954.jpg

Sasha top

20130404-213121.jpg

Tee dress

20130404-213158.jpg

Maxi convertible

20130404-213231.jpg

Pixie pocket skirt

20130404-213306.jpg

Please feel free to follow me on Twitter or Pinterest @RefashionMama or visit my RefashionMama Boutique

Sewing tip: Easy peasy spaghetti straps with a serger

Ever try to make spaghetti straps? Seems doable, right? Just sew down one side of a strip of fabric that’s been folded in half lengthwise…then turn it to the right side…wait, how the heck do ya turn it?!? Sure, you can use the old safety pin trick to try and push one end through the other, but what if your strap is too thin? What if your safety pin opens half way through pushing it through?

TRY THIS! If you own a serger, making spaghetti straps just got real easy!

First, make a long chain stitch by serging with no fabric (you want this chain to be the same length as your fabric strip or longer). Pull on the chain stitch to lengthen.

20130321-160636.jpg

Next, lay the chain stitch down the middle of your fabric strip and fold fabric in half.

20130323-231836.jpg

Now, serge down the right portion of the fabric strip, making sure to avoid the chain stitch thread. Serge all the way down the strip and cut the end of the chain stitch.

20130323-232005.jpg

Now, pull on the end of the original chain stitch that’s laying down the middle of your new fabric tube.

20130323-232232.jpg

Keep pulling so that the tube slides through the other end, pulling itself right-side out.

20130323-232504.jpg

20130323-232514.jpg

Pull on the chain stitch until you’ve turned the entire tube right side out. And now, you have a spaghetti strap!
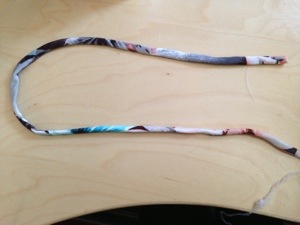
20130323-232715.jpg

Sewing tip: Re-attaching an existing zipper

Ever find yourself with this problem?

20130311-150249.jpg

I bought this pair of skinny jeans for a mere $8 since the zipper needed mending. I’m a sewer so I figured it’d be a quick fix . Well, time has gone by and I haven’t found the time to mend them until now. Luckily, I had just enough matching thread leftover from another project.

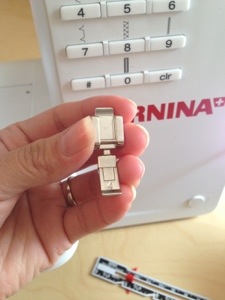
So, I pulled out my zipper foot.

20130311-165626.jpg. And I moved my needle to the left position…if you have a Bernina, make sure you do this or you’ll break a needle.

20130311-165942.jpg

With any machine, I advise you to check your needle position any time you place a different foot on. I do this by manually turning the dial to make my needle move to the down position. This way you know if you need to move your needle position to the left or right (and you won’t break a needle!).

20130311-170445.jpg

20130311-170514.jpg

Now, I just placed the foot down on the zipper, turned my dial by hand to place my needle down and made sure it was lined up with the existing stitching.

20130311-174056.jpg

I sewed a straight stitch down the side of the zipper. It does get a little tricky down at the bottom since it get bulky and you’ll have to smash your zipper down a bit (or maybe just zip it up!). Make sure you reinforce your stitch when you start and stop…maybe you can avoid having to mend it again!

20130311-174926.jpg

Now, your zipper is back in place! And it’s time to rock your cute jeans again 😉

20130311-175215.jpg

20130311-175223.jpg

Follow me on Twitter & Pinterest @RefashionMama or LIKE RefashionMama blog page or LIKE RefashionMama Boutique